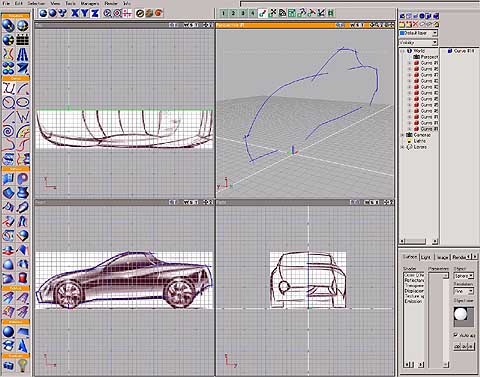
NURBS modeling: 'KNR1' with solidThinking
This tutorial shows the way to create 3D CAR MODEL
of YOUR OWN DESIGN quickly and efficiently. The model is not super detailed,
though you can add details, interior, create round and fillet surfaces
later. The most important thing is to present YOUR IDEA through creating
your model.
This is my first model made with solidThinking.
Thanks to its sophisticated interface design, I could learn basics of
this software very quickly. It takes 55 hours (12 days) to finish this
model. This also includes the time to learn solidThinking. I am sure that I can do more quickly next time. (^_^)/
[[Keys to SUCCESS]]
[Use Browser]
To understand Construction Tree, to pick object
accurately, to create a group or a layer... When you modify (Intersect,
Trim...) object, solidThinking keeps every step in Browser as objects.
An original object is automatically hidden in interactive views and rendering
when you modify the object. You can make them visible simply by turning
off 'Hidden in interactive' button and 'Hidden in rendering' button on
the Browser. This means you can go back to any step, anytime. Naming important
curves and surfaces in Browser will help you to understand what they are
later. Also deleting useless hidden object is important to avoid that
your data become unnecessarily large.
[Group objects, use Layers]
In Browser, you can create groups and layers easily.
These features allow you to organize your objects in 2 ways. For example,
use groups to sort objects according to their Materials, use layers to
sort them according to parts such as a body, a cabin and details.
[Use Snap tools]
'Snap to curve' + 'Snap in 3D' help you to make
boundary curves in Perspective view.
[Think well before you start]
Consider well about a construction of your model
before you start. You don't really have to worry about character lines,
surface sections, or details. Flexible tools of solidThinking allow you
to determine them interactively through your modeling processes. Though,
you have to think very well about how to model it step by step, before
you start. Prepare several ways, try the simplest one first.
[[modeling steps]]
In this tutorial I call Front view -> 'Side
view' (X-Z plane), and RIGHT view -> 'Rear view' (Y-Z plane). Please
don't be confused. Also, I usually call horizontal curves rails or rail
curves, vertical curves sections or section curves.
|
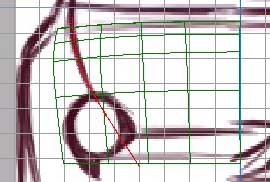
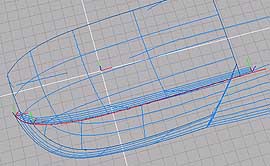
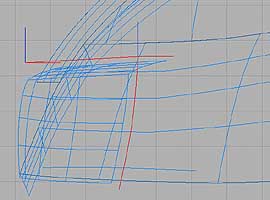
[01: draw centerlines] Import template sketches as background images. Translate and Scale them to match to grid lines. Trace centerlines. Draw curves longer to get intersection
with neighboring curves. ->tips#12 Look at your curves very carefully on every view. |
|
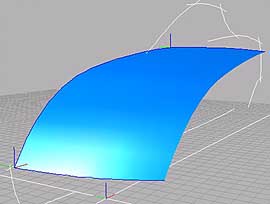 |
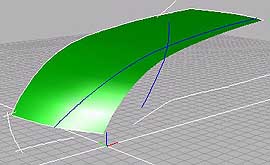
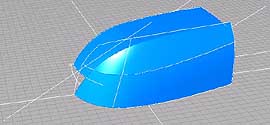
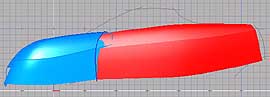
[02: create HOOD surface] Draw section curves for HOOD surface. ->tips#1 Create Birail surface. |
|
|
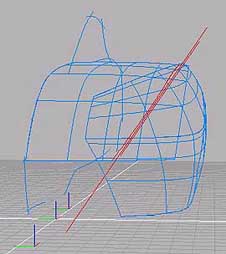
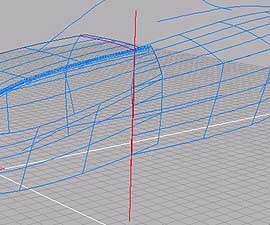
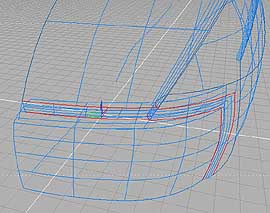
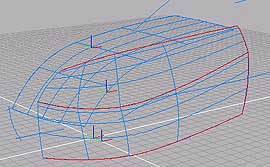
[03: project fender-top line] On Rear view, trace fender-top character line,
then project it onto HOOD surface. This is a reference line. Modify
the line and HOOD surface until you can get both of the good surface
and the line (curve on surface). |
 |
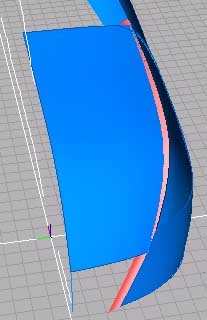
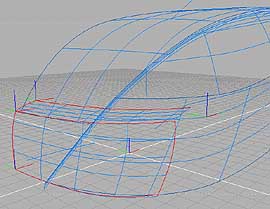
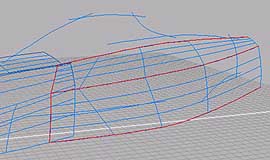
[04: create FRONT FENDER UPPER and LOWER surfaces] Draw section and rail curves for FRONT FENDER UPPER
and LOWER surfaces. Create Birail surfaces. |
|
|
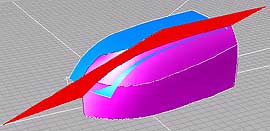
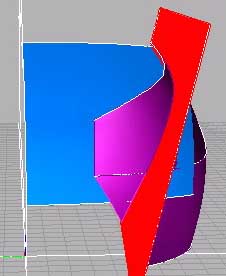
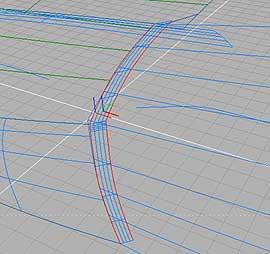
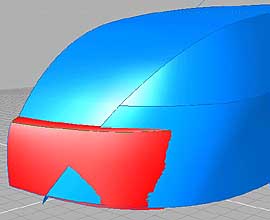
[05: trim HOOD and FRONT FENDER surfaces] Set Perspective view so that the projected line
on HOOD surface looks almost straight. In front and behind of the projected line, create
parallel 2 straight lines that overlaps the projected line on the
view. Create Skin surface with these straight lines. Intersect with HOOD and FRONT FENDER surfaces.
This technique is useful to get nice intersection line or to create
nice curve-on-surfaces. Delete Skin surface. |
 |
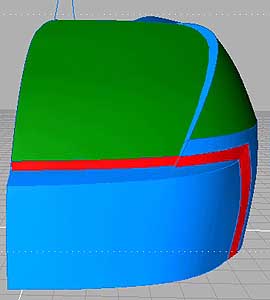
[06: create SIDE UPPER and LOWER surfaces] Draw section and rail curves for SIDE UPPER and
LOWER surfaces. Rail curves should be started on FRONT FENDER surface
edges. Create Birail surfaces. |
|
|
[07: create RAMP surfaces between HOOD and FRONT
FENDER surfaces] Extract edges of the fender top line (top edges
of FRONT FENDER surfaces). EdgeExtract is one of strong points of
solidThinking. Draw section lines. Create Birail surfaces. |
|
|
[08: create DOOR PARTING surfaces] On Side view, trace door-parting line. Make sure
that you make the line slightly forward of FRONT FENDER and SIDE
intersection line. If you don't, modify section and rail curves
of SIDE surfaces. Project it onto FRONT FENDER surfaces Set Perspective view so that the projected line
on FRONT FENDER surface looks almost straight. In front and behind of the projected line, create
parallel 2 straight lines that overlaps the projected line on the
view. Create Skin surface with these straight lines. Intersect with FRONT FENDER surfaces. Delete unnecessary parts of FRONT FENDER surfaces. Delete Skin surface. Extract edges of the door-parting line. Copy and Paste them. Create Skin surfaces. |
|
|
[09: create BUMPER UPPER and LOWER] Draw boundary (section and rail) curves. ->tips#5 Create Coons surfaces. |
|
|
[10: create BUMPER RAMP surfaces] On Side view, draw a curve to cut surfaces at bumper
parting line. Trim HOOD, FRONT FENDER and RAMP surfaces. Extract edges of the bumper parting line. Group the edges, Copy and Paste it, Scale it. Create Skin surfaces. |