|
|
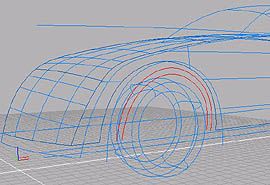
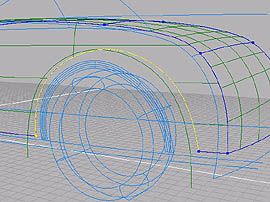
Create WHEEL FLARE surfaces. At the first, create FLARE END surfaces.
Click the tool icon, pick the outer edge curve, then inner. Press spacebar to create Skin surface. Do same actions for rear. |
|
|
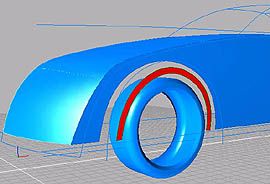
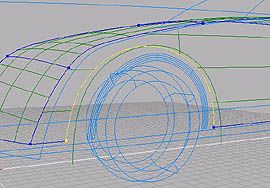
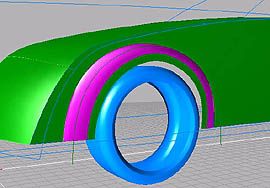
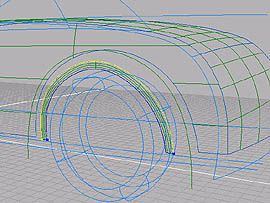
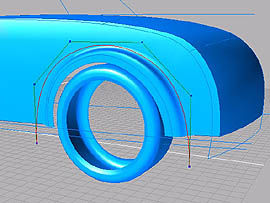
Create WHEEL FLARE surfaces by bending SIDE and FLARE END surfaces.
Click the tool icon, pick SIDE surface, and pick trimmed edge on SIDE surface near the front end. Press spacebar to go to the next step. Pick FLARE END surfaces, and pick its outer edge near the front end. To avoid creating twisted Blend surface, you should pick edges near the end of same side. Press spacebar to create WHEEL FLARE surface.
Now Blend surface is created, though, its SIDE surface side is flipped.
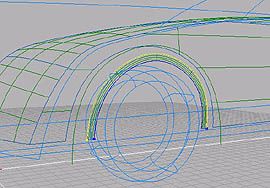
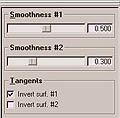
Open 'Modeling Tool' from the 'Managers' menu. Check 'Invert surf. #1' at 'Tangents' menu. You will see that WHEEL FLARE surface is smoothly blended to SIDE surface. Also try modifying 'Smoothness' values.
|
|
|
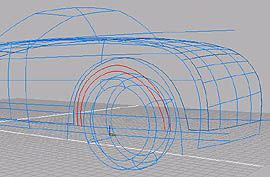
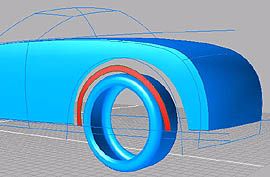
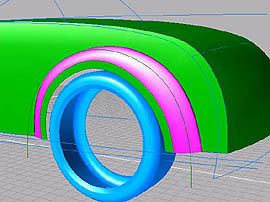
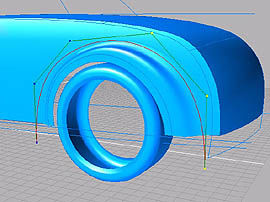
Do same actions for rear WHEEL FLARE surfaces.
Here you can experience the great feature of solidThinking construction history. Pick the wheel flare projection curve, press spacebar to enter 'Edit mode'. If you modify the shape of the curve, trimmed edge and Blend surface follow the modification. (Wow!) Press spacebar again to back to 'Object mode'. |
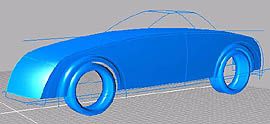 |
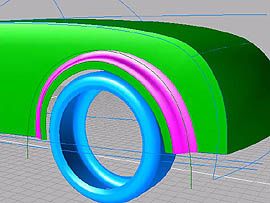
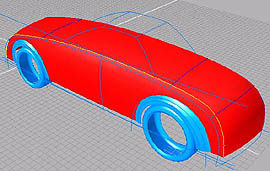
Now it is almost the car! |
|
|
Create round surfaces between SIDE and TOP surfaces.
Click the tool icon, the program console prompts 'Radius', type '1' and press enter. Pick SIDE-TOP surface (SIDE and TOP surfaces were unified because of Intersect), and pick all of shoulder edges. Press Ctrl key down to pick multiple edges. Press spacebar to create Round surfaces. |
|
|
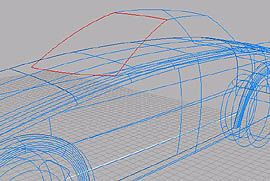
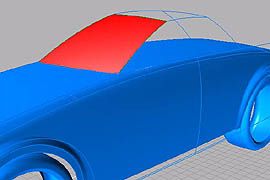
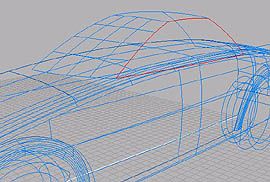
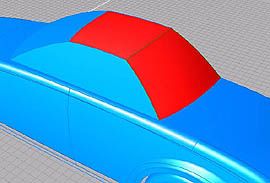
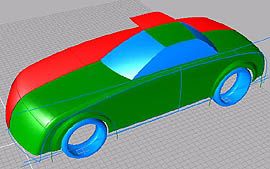
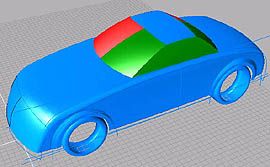
Create cabin surfaces.
Create FRONT WINDOW surface. Click the tool icon, pick curves clockwise or counterclockwise.
Do same actions for SIDE WINDOW, ROOF and REAR WINDOW surfaces.
|
|
|
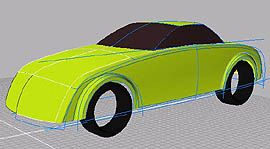
Create right side of the body.
Mirror body color parts. Click the tool icon, pick SIDE-TOP, WHEEL FLARE, FLARE END and ROOF surfaces. Press spacebar to mirror surfaces. The program console prompts 'Mirror along', type 'V' (Vertical) and press enter. Do same actions for FRONT WINDOW, SIDE WINDOW and REAR WINDOW surfaces. It is better to mirror every materials. |
|
|
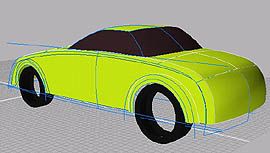
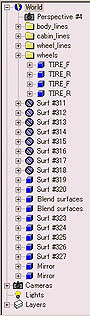
Assign materials to objects: body, glasses and tires.
Open 'Browser' from 'Managers' menu, open wheels folder, pick right side TIRE_F and TIRE_R and switch off the 'Hidden in interactive views' icon at the top of the Browser panel.
|
|
|
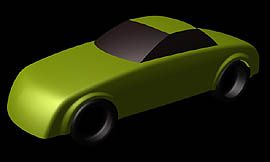
Let's 'Render current view' from 'Render' menu. You did it! *You can download this finished version of sT data at library section. |