NURBS modeling: solidThinking basics
solidThinking is the powerful tool to create industrial models such as cars and electrical products. Followings are my personal opinion about this software...
'Create shapes just like you want!'
*Powerful and flexible modeling tools.
-*Wide variety of surfacing tools, trim, intersect, edge extract...
-*You don't have to obey 'the laws of the software'.
*Construction history.
-*Modify a curve --> surface shape, trimmed curve... updated accordingly.
-*Have a conversation with a shape! It provides us great interactivity.
*Effective browser.
-*It keeps modeling history automatically.
--You can go back to any step of your modeling.
-*Groups and layers management.
*Beautifully designed, sophisticated interface.
-*You can understand it intuitively.
--It allows you to learn solidThinking very quickly.
In this tutorial, I would like to show you the basics of solidThinking modeling, though at the same time, it will be the basics of industrial design modeling method.
|
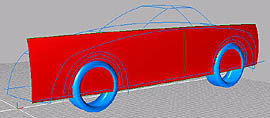
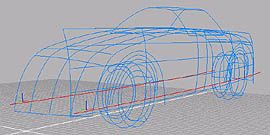
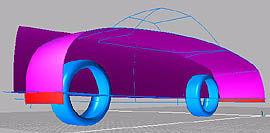
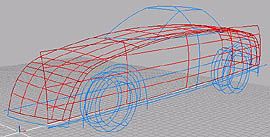
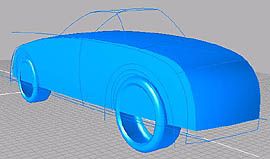
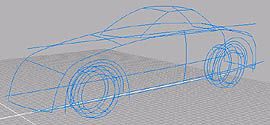
Download sTbasics 'lines only' sT format data at library section. The file is zip compressed. When you open the file, you will see the perspective view like the left picture. |
|
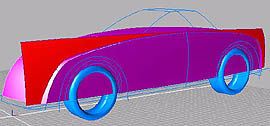
Create SIDE surface.
Click the tool icon, pick section curve, then pick rail curves. If the surface is twisted, open 'Modeling toolbar' in 'Managers' menu, switch off the 'Invert rail' check button in 'Options' menu.
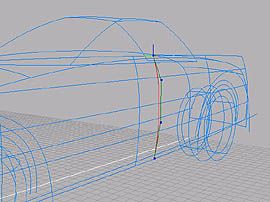
If you modify the shape of the section curve, the surface shape will be updated accordingly. Pick the section curve, and toggle 'Edit mode' by pressing spacebar, then you can modify the shape of the curve. To toggle 'Object mode', press spacebar again.
|
|
|
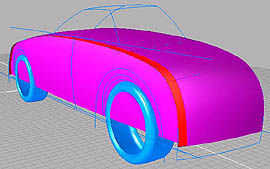
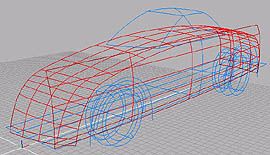
Create TOP (FRONT-TOP-REAR) surface.
Click the tool icon, pick 2 curves in the X-axis direction, then press spacebar, pick 6 curves in the Y-axis direction sequentially, then press spacebar. |
|
|
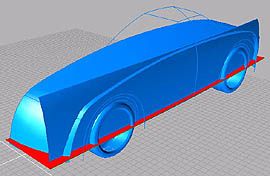
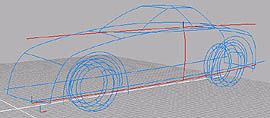
Create BASE surface. This surface will be used to cut off the unnecessary part of the other surfaces.
Click the tool icon, pick 2 curves, then press spacebar. |
|
Cut off the unnecessary part of SIDE surface and TOP surface.
Click the tool icon, pick SIDE surface, then pick BASE surface. The console prompts 'Store each face as a separate object?' Type 'N'. The console prompts 'Choose which surface will be split'. Type '1' to divide only SIDE surface. Click the tool icon again, pick TOP surface, then pick BASE surface. Repeat the same actions as SIDE surface. To pick one part of a divided surface, holding Alt key down (Windows) and click left button of the mouse. Otherwise even the surface is divided, you will pick entire part of the surface. Delete the parts of SIDE and TOP surfaces below BASE surface. TOP surface has 2 parts to be deleted. In this case, press down Alt key and Ctrl key (Windows) for multiple selections.
|
|
|
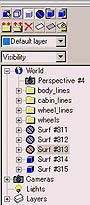
Open 'Browser' from 'Managers' menu. It might be opened already. Browser is the effective tool to manage objects, groups and layers. Pick BASE surface by clicking on Browser, switch on the 'Hidden in interactive views' icon at the top of the Browser panel. 'Hidden in rendering' is also automatically applied. Now BASE surface is invisible at both of modeling windows and renderings. |
|
|
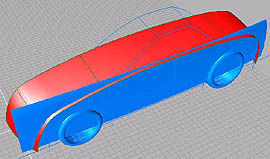
Click the tool icon, pick SIDE and TOP surfaces. The console prompts 'Store each face as a separate object?' Type 'N' to make SIDE and TOP surfaces into one object. The console prompts 'Choose which surface will be split'. Type 'B' to divide both of SIDE and TOP surfaces. Delete the external parts of SIDE and TOP surfaces. TOP surface has 5 parts to be deleted, because the original surface is the Curves network surface that is divided by section curves. |
|
|
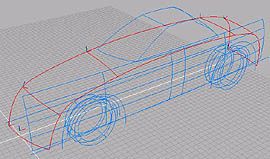
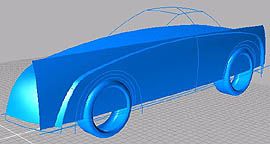
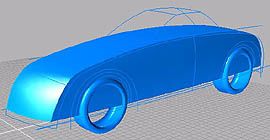
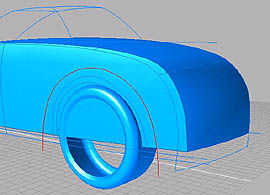
It is becoming a car little by little... Browse your model in the perspective window. |
|
|
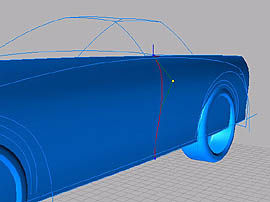
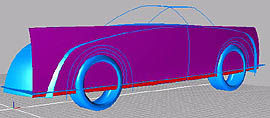
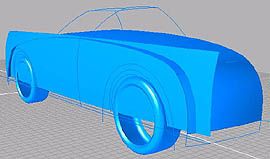
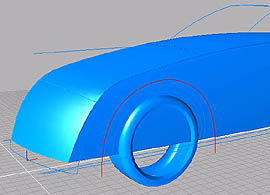
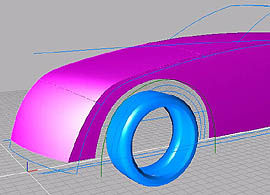
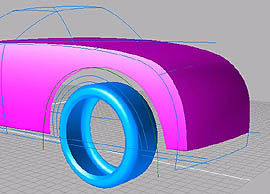
Trim SIDE surface to create wheel flare surfaces.
Click the tool icon, pick the front wheel flare projection curve, then SIDE surface. You will see trimmed SIDE surface. Do same actions for rear wheel flare. |